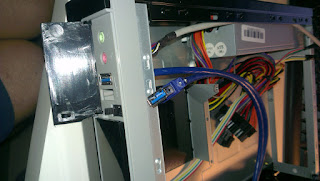
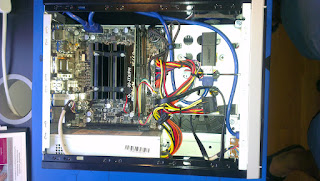
This post show you how to install Kodi and a minimal Linux environment. My goal was to build a NAS / HTPC based on cheap hardware and with minimal software environment. My request was to keep the possibility to extend the software with further services. This is why I ignored OpenElec.
First I installed on Debian Jessie, but this sytem with the buggy systemd is...
So I changed to Debian Wheezy. I had good experiences with it
Linux installation
To install Debian on Asrock QC 5000 mainboard, you may need the support for the Realtek network card. It is a non-free driver, which is not included in the normal Debian insallers. You will receive similar error messages during Linux install:
Missing non-free module: rtl8168
The solution was here:
https://raphaelhertzog.com/2011/03/14/missing-firmware-in-debian-learn-how-to-deal-with-the-problem/
The installer can be downloaded from here:
http://live.debian.net/cdimage/release/stable+nonfree/amd64/iso-hybrid/debian-live-7.6.0-amd64-standard+nonfree.iso
After a smooth installation I continued with the Kodi related installation
Kodi Installation on Debian 7
Some help can be found on Kodi's Wiki pages:
http://kodi.wiki/view/HOW-TO:Install_Kodi_for_Linux at chapter 2.1
Install the following package to support http repository:
apt-get install apt-transport-https
Add the following to /etc/apt/sources.list.d/kodi.list
deb https://people.debian.org/~rbalint/ppa/xbmc-ffmpeg xbmc-ffmpeg-unstable/
deb http://http.debian.net/debian unstable main
Install Kodi and xinit to run it:
apt-get update
apt-get install kodi xinit
Install suitable xserver-xorg for VGA card
For A4 5000 CPU and QC5000 main board:
apt-get install xserver-xorg-video-radeon
Test it with xinit command
If xinit adds "No screen found" then you may installed wrong version from xserver-xorg-video-radeon. After removing the wrong one (apt-get remove) it installs the default, not VGA card specific versions and the application should start smoothly
Kodi basic configuration
Some help can be found here
https://trick77.com/how-to-install-kodi-ubuntu-server-14-04/
Create the user and add to related groups:
adduser --disabled-password --disabled-login --gecos "" kodi
usermod -a -G audio kodi
usermod -a -G video kodi
usermod -a -G input kodi
usermod -a -G dialout kodi
usermod -a -G plugdev kodi
usermod -a -G tty kodi
It is not a serious issue, happens on Wheezy and on Ubuntu
usermod: group 'input' does not exist
Let Kodi user to start graphical application:
dpkg-reconfigure x11-common
chose anybody from the list
Or
Edit /etc/X11/Xwrapper.config and replace allowed_users=console with allowed_users=anybody
Kodi init script for automatic starup at system boot:
Create a /etc/init.d/kodi with following content:
#! /bin/sh
### BEGIN INIT INFO
# Provides: kodi
# Required-Start: $all
# Required-Stop: $all
# Default-Start: 2 3 4 5
# Default-Stop: 0 1 6
# Short-Description: starts instance of Kodi
# Description: starts instance of Kodi using start-stop-daemon and xinit
### END INIT INFO
############### EDIT ME ##################
# path to xinit exec
DAEMON=`which xinit`
# startup args
DAEMON_OPTS="`which kodi-standalone` -- :0"
# script name
NAME=kodi
# app name
DESC=Kodi
# user
RUN_AS=kodi
# Path of the PID file
PID_FILE=/var/run/kodi.pid
############### END EDIT ME ##################
test -x $DAEMON || exit 0
set -e
case "$1" in
start)
echo "Starting $DESC"
start-stop-daemon --start -c $RUN_AS --background --pidfile $PID_FILE --make-pidfile --exec $DAEMON -- $DAEMON_OPTS
;;
stop)
echo "Stopping $DESC"
start-stop-daemon --stop --pidfile $PID_FILE
;;
restart|force-reload)
echo "Restarting $DESC"
start-stop-daemon --stop --pidfile $PID_FILE
sleep 5
start-stop-daemon --start -c $RUN_AS --background --pidfile $PID_FILE --make-pidfile --exec $DAEMON -- $DAEMON_OPTS
;;
*)
N=/etc/init.d/$NAME
echo "Usage: $N {start|stop|restart|force-reload}" >&2
exit 1
;;
esac
exit 0
Set the permission:
chmod +x /etc/init.d/kodi
Set the automatic startup:
update-rc.d kodi defaults
Jessie complains about the init script, but chkconfig you can wokaround it:
apt-get install chkconfig
chkconfig kodi on
Test it with the following:
# find /etc/rc?.d| grep kodi
/etc/rc0.d/K01kodi
/etc/rc1.d/K01kodi
/etc/rc2.d/S04kodi
/etc/rc3.d/S04kodi
/etc/rc4.d/S04kodi
/etc/rc5.d/S04kodi
/etc/rc6.d/K01kodi
Kodi power off issue
Some information can be found
http://forum.kodi.tv/showthread.php?tid=130419
and
https://www.raspberrypi.org/forums/viewtopic.php?f=28&t=108209
Install some packages:
apt-get install policykit-1 upower acpi-support consolekit
Create the /var/lib/polkit-1/localauthority/50-local.d/50-kodi.pkla file with the following content:
[Actions for kodi user]
Identity=unix-user:kodi
Action=Action=org.freedesktop.upower.*;org.freedesktop.consolekit.system.*;org.freedesktop.udisks.*
ResultActive=yes
ResultAny=yes
ResultInactive=no
Clean up
apt-cache clean
Reboot the system. Kodi should start automatically and everything should work properly.
If you notice that
Kodi uses CPU more than 100% (if you have more than one cores) check the following:
Log in to that machine and with
top -H check the threads
If you notice that,
llvmpipe processes are running (each for every CPU core)
Then your system uses software rendering. If your system supports hardware rendering, then you need to install the proper VGA driver.
For Ashrock QC5000 and
Ati Radeon HD 8330 please check my
other post.
The CPU usage with idle Kodi should be under 5%


